

Quick DIY: Light Fixture Transformation

")

Can’t find the lighting you want in the color that you want?
Grab some spray paint!
In this DIY, I altered an off-the-shelf fixture to better match the aesthetic I created for my One Room Challenge project.
After frantically searching for a replacement fixture after a previous order was not able to be shipped, and then a replacement option for that order was cancelled after the proposed delivery date, I was feeling the pinch.
I began looking for a local option that was in the store and available for pick-up the same day. Where did I look?

IKEA.
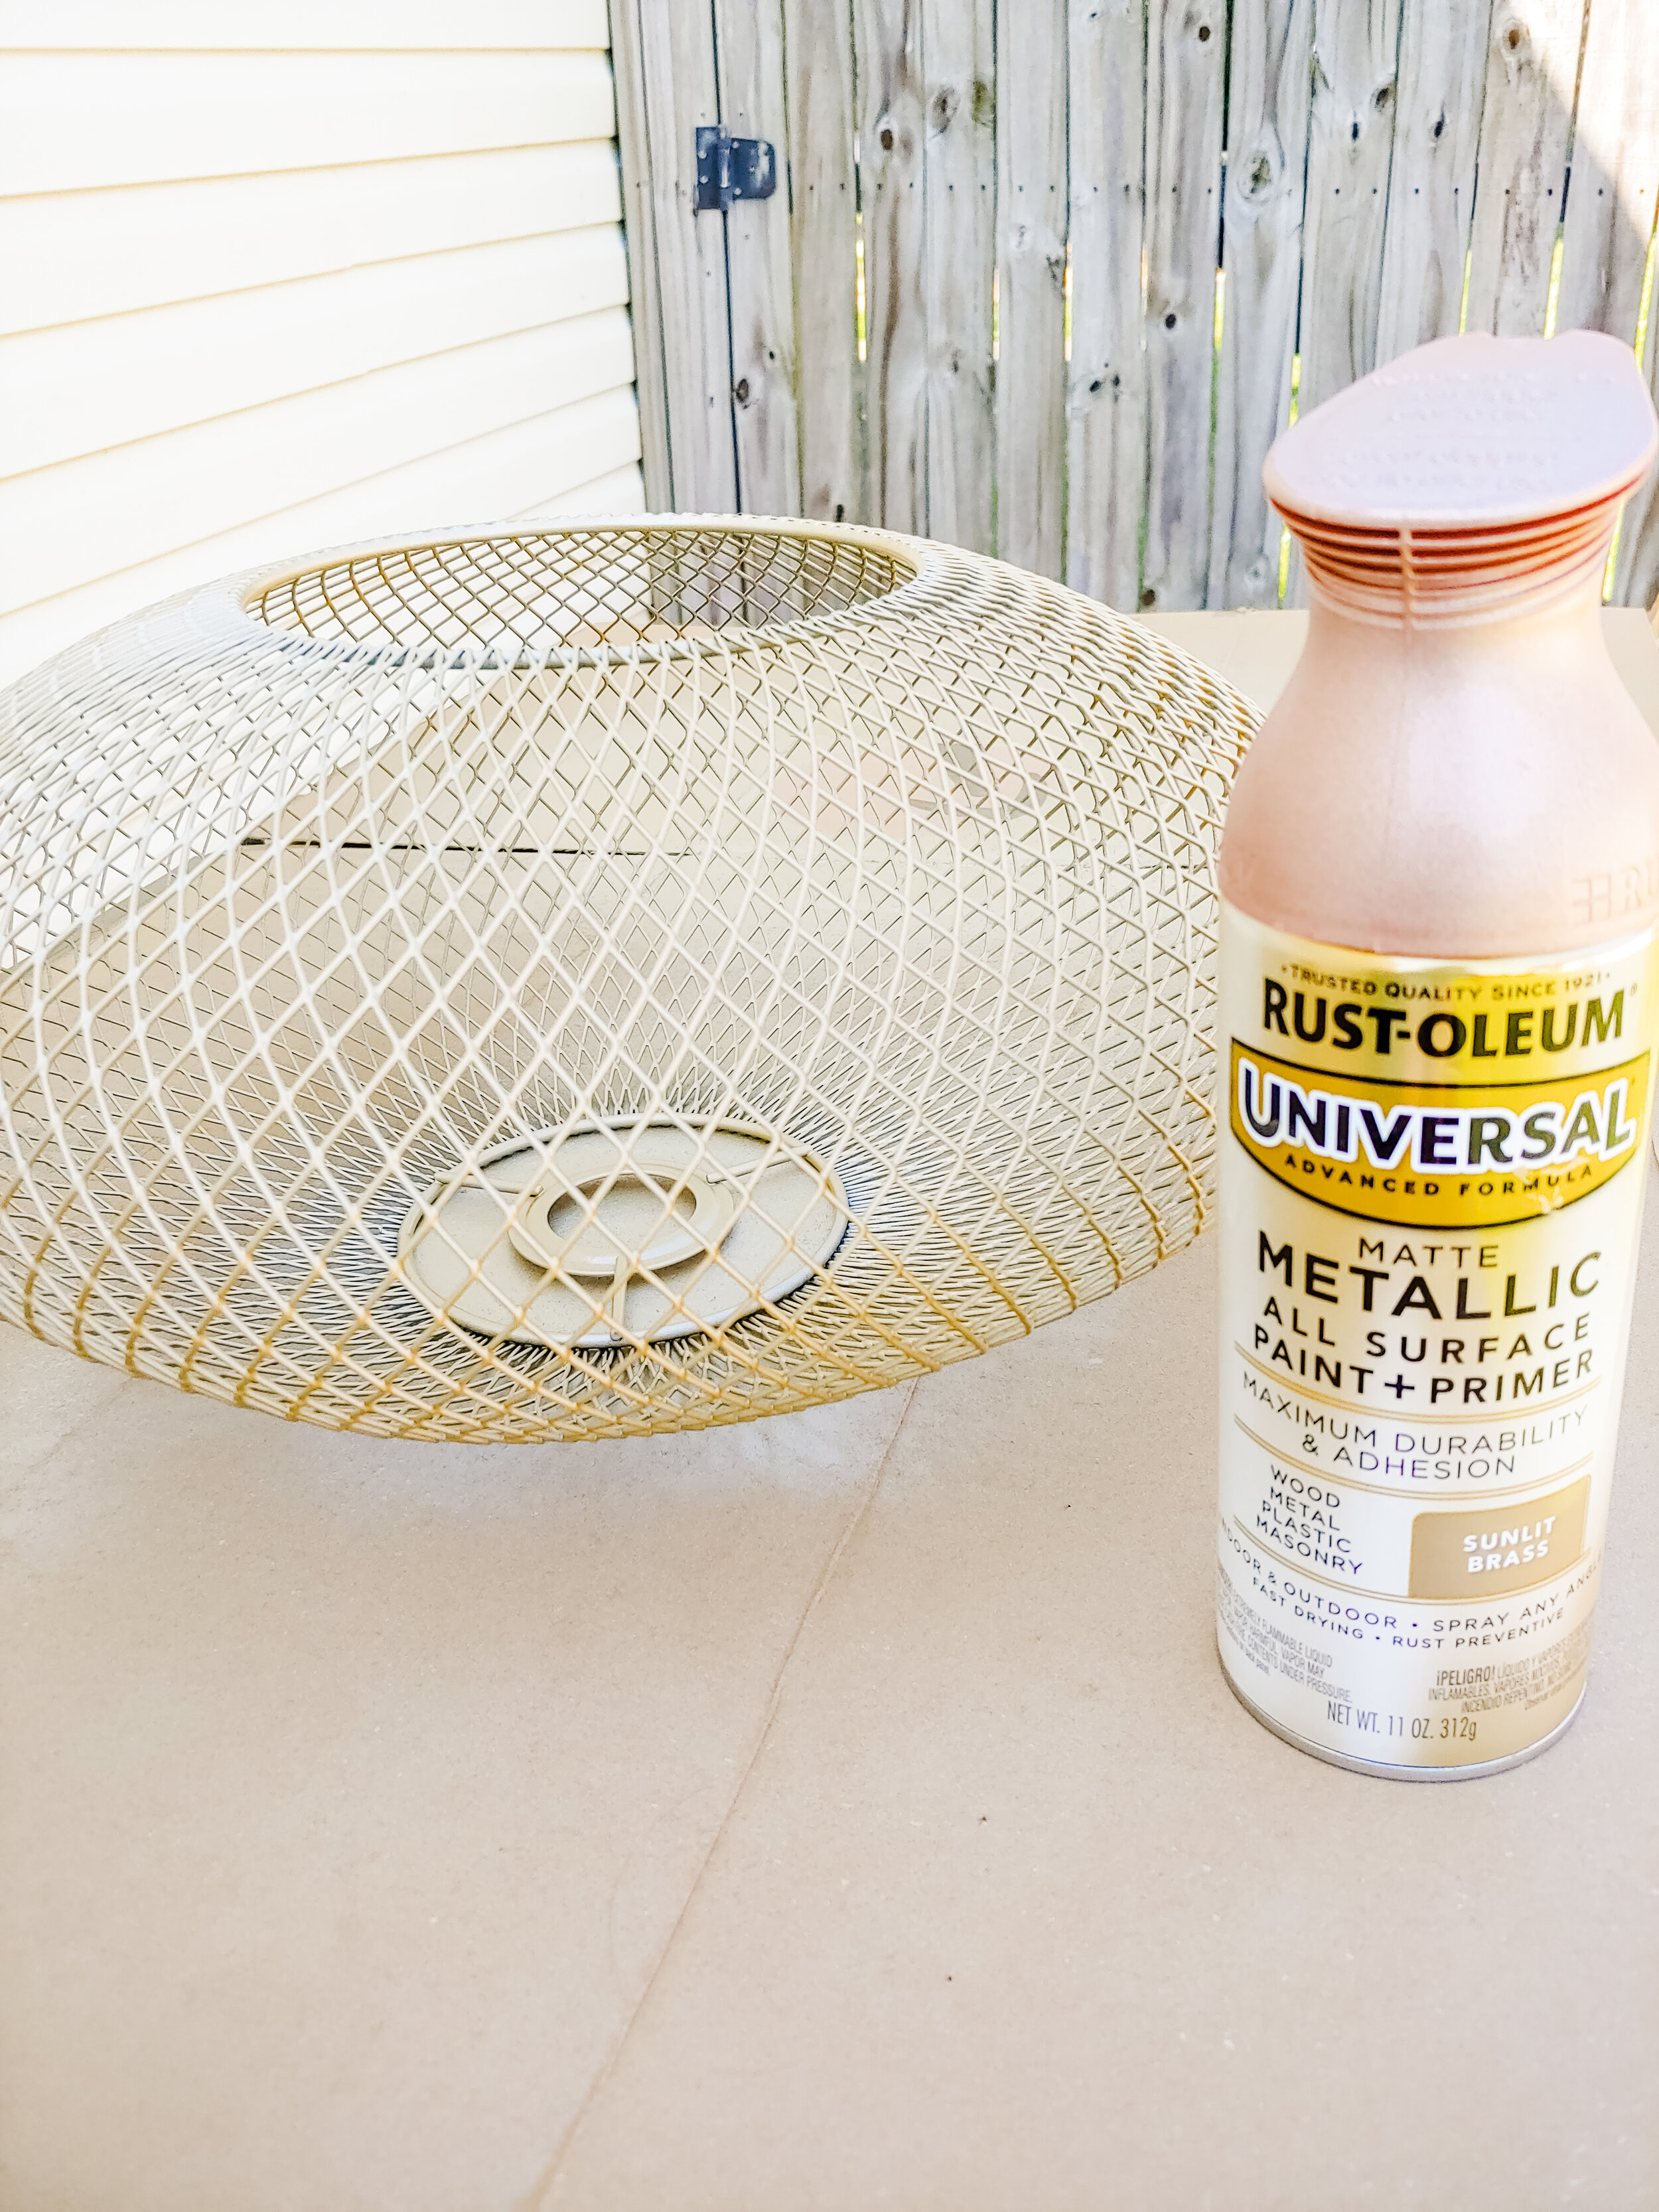
I knew that I could look online and verify stock and once I found the option I wanted and was the best match – I placed an order for pick-up at my local store. The options available were a standard black matte finish, which was okay, but I wanted something to pick up more on the brass element of my design and the arched mirror in the entryway. After picking up my light fixture, I began honing in on my color choices. I had a spray paint from another recent DIY (which I’ll share soon) but the color wasn’t quite right.
I knew I wanted a brass finish – so, when I found the Sunlit Brass spray paint from Rustoleum, I knew I had to check it out. I picked it up from my local Home Depot (along with some more plants for the garden) and headed home on a beautiful sunny day to paint and plant.
After planting my new veggies in the garden, I set up my workstation and made sure to place some scrap cardboard I had laying around to prevent transferring paint to the work table. The day was nice and warm, and not overly windy which made spray painting a breeze.
Pro tip: when spray painting – you want to make sure the humidity is relatively low and it’s not going to rain for a few days to allow the paint to cure properly. Not sure? Just check the instructions on the can. It can get pretty humid where we are, so when the opportunity strikes, I’m on it!
I began painting a light coat over my two pieces, letting them dry for a few minutes in between. This was SO much fun!
After I got the main fixture piece completed on one side, I flipped it over to be sure to cover the surface that we’re going to see. The structure of the shade actually made it very easy to paint all sides as the wire mesh allowed the paint to pass through so it left me with a beautiful and flawless finish.
I let it dry in the direct sun for about an hour and then moved it inside the garage to cure overnight on the workbench.
Here’s the result:
What do you think? I’ll be sharing all the details in my final reveal post for the ORC (week of June 25th) as well as my Shop the Look Concept for the Entryway.
What’s something you’ve been wanting to paint? Let me know in the comments.
Stay tuned for the next DIY release next week!
Cheers!
Catch up on the latest posts here: ORC Week 1 | ORC Week 2 | ORC Week 3 | ORC Week 4

Not sure where to start?
Get Catherine's complimentary home tips here!

build your furniture investment: the workbook
SHop Our favorite Collections online
how to combine textures for a balanced home

For more of our latest projects, follow along on instagram at @peacockanddahlia
©Peacock & Dahlia 2025 | design by tonic + Sophia STudio | photos by Sophia Studio + Elevae
Intentional Design for Soulful Spaces
virginia beach, va


+ Show / Hide Comments
Share to: